Wednesday, September 28, 2011

How to: Wristers

Winter and fall are the time of year that you want to bundle up.  It is getting colder in Denver so it is that time of year to start thinking about bundling up.  In today's tutorial we will be learning a pattern for wristers.  These cute little guys have a simple cable and a rib stitch at the top and bottom.  Wristers are great because they keep you warm but still allow you to use your fingers for doing things.  They are like a jacket when a sweater is just to much.  I hope that you enjoy this pattern as much as I did making it up.  To learn the basics of knitting that you will need for this pattern visit this link.  Also I would be happy to help if you have any questions.

 Supplies:
#8 straight or circular needles, or needle size to obtain gauge
(2) cable hooks
yarn needle
One ball, approximately 4.5 oz
Worsted Weight Medium Thickness Yarn (Some brands of yarn call this a #4 thickness)
I used a wool and acrylic blend.  The blend allows the yarn to be washed without shrinking or felting.

Gauge:
20 stitches and 22 rows = 4" in stockinet stitch

CO35
Row1: K1, *P1, K1*, Repeat until end, turn
Row2: P1, *K1, P1*, Repeat until end, turn
Row 3 and 4: Repeat Row 1 and 2
Row5: P13 (place marker) K9 (place marker) P13, turn
Row6: K13, P9, K13, turn

Left hand Row 7: P7, Bind off three stitches, P3, K9, P13
Left hand Row 8: K13, P9, K2, Increase K2 in next stitch, YO, Increase K2 in next stitch, K6

Right hand Row 7: P13, K9, P3, Bind off three stitches, P7
Right hand Row 8: K6, Increase K2 in next stitch, YO, Increase K2 in next stitch, K2, P9, K13

Cable:
RowC1: P13, slip next 3 stitches on to cable hook and hold in back, slip next 3 stitches on to second cable hook and hold in front.  K last 3 stitches, K stitches off of second cable hook, K stitches off of first cable
RowC2: K13, P9, K13, turn
RowC3: P13, K9, P13, turn
RowC4 to C13: Repeat Rows C2 and C3
RowC14: K13, P9, K13, turn

Repeat Cable one more time.  You can another full cable depending on the length that you want up the arm. 

Row 37: Repeat Row C1
Row 38 to 45: Repeat Rows C2 and C3
Row 46: K1, *P1, K1*, Repeat until end, turn
Row 47: P1, *K1, P1*, Repeat until end, turn
Row 48 and 49: Repeat Row 46 and 47
Row 50: K1, *P1, K1*, Repeat until end, turn
Bind off in Rib stitch

Cut off tail, leaving long string.  Thread onto yarn needle and sew up seam.  Tie off and weave in ends.

Wednesday, September 21, 2011

Upcycled Lamp Shade

I come to you today with a fun craft that I did over the weekend and some sad news because I lost my job today.  Boo hoo, whaa whaaa whaaa.  Ok so now that I am done crying it out I am ready to get on with my life.   I have been really sick of my job for a while now and maybe this is the blessing that I have been looking for.  I am still waiting for the silver lining to appear, but I know that only good things will happen in my future.

On to the fun craft.  As you know I am redecorating my spare bedroom.  I have painted the built in dresser and stool for the sewing machine a nice gray/blue color.  As I was putting all the stuff back in the room that normally belongs there I noticed that I had this candle holder that looked like a light house.  I can't remember now where I got it from, but I always liked it and thought that it was pretty.  I kept it but never used it for its intended purpose of being a candle holder.  Sure it had a candle in it but it has never been lit.


Here is the candle holder prior to my complete destruction of it.  I ripped off the top and the handle that was used to hang it up.  I took out the candle thing from the bottom.  I turned the holder upside down and tried to attach it to the IKEA light.  It turned out that the holder hole was too big for the light attachment thing so I had to modify it to make it a little smaller.  I used regular masking tape to make the hole smaller.  The screw attachment for the light now fit perfectly in the hole, so I put the light back together and assembled.  The following pictures are how my creation turned out.


The light cord that I used was a prewired thing that i picked up from IKEA.  I used the plastic piece and screw hook that came in the package to hang the light and then plugged it into the wall outlet that is attached to my switch on the wall.  Now with a flip of a switch I have a beautiful new light in my sewing room.


Tuesday, September 20, 2011

Stool Makeover


I have this great memory growing up and sewing things with my grandma.  She has this old Singer sewing machine that is in a table.  When the sewing machine is closed it looks like a plain looking table.  She usually has a lamp and a doily on it.  But then magic happens when you lift up the lid you reveal a sewing machine that is ancient.  It smells old and reminds me of good times.  The best part about this machine is that it always works.  It is simple and can only do the most basic of stitches, but it is perfect and still in great working order after all these years.  Some of you might think that this is morbid but I always say to my grandma this is the one thing that I want when she dies.  We have such great memories making stuff with this machine, it will always be something that I want to hold on to.

A few years ago when I bought my own house my mom decided that I needed a sewing machine.  I don't really know what for.  It had been many years  since I had made anything, but I guess that every time that I did I had to haul all the stuff over to Grandma's house.  Anyway since I had a such a strong bond with my Grandma and her machine, my mom found an old Singer machine for me that was mounted in a table.  It was beautiful and you can tell that the woman that owned it before me loved to sew and really took care of what she had.  The wood is still in perfect condition and the machine and all its accessories where there and in their original boxes with all the instructions.  She also had this old wooden bench that reminds me of a piano seat.  The top lifts off revealing a storage area in the top of the stool.  I feel like I get to open up presents now each time that I sew.  A few weeks ago when I decided that I was going to remodel my spare bedroom I also decide that I wanted to move my sewing machine into this room.  However the bench for the sewing machine was old and in need of a little spruce to make it "go" with the new room.  Here is an idea for a quick makeover on an old piece that you might have laying around.


First I  painted the wood part of the stool the same color that I painted the dresser that I painted in the new room.  Once again I had to do a few coats with a fine paintbrush.  I went with the grain of the wood to try and minimize the appearance of the brush strokes.

Next I recovered the cushion for the stool.  I added an additional layer of batting first.  I placed the batting over the top and then used a staple gun to attach it to the bottom in a few places (don't go over board with the staples on the batting otherwise they will get in the way when you try and attach the cover).
Place the fabric that you want to use over the top of the cushion now.  You do not have to cut the fabric to size but just start in the corner of the fabric and make sure that it is oriented the right way.  If you are using a fabric with a geometric pattern make sure that you center the design on the cushion top.

 
Starting on one edge ensure that the fabric is straight and start stapling it to the base.  Next go to the opposite side of the square pulling the fabric tight over the top and stapling from one end to the other.  Then do the sides of the square.  Last you will have the corners.  Fold the layers of fabric neatly inward and then pull tight to staple.  If you did not cut your fabric before hand it will look like you have a complete mess on the bottom of the piece at this point.  Use some sharp fabric scissors to cut away the fabric close to the location where you stapled it.

Now put the newly covered cushion on top of your freshly painted stool and you have a new masterpiece.  I am debating about adding bows to the corners of this piece.  I want to see how the rest of the room turns out and then I will decide what I want to do.  If I do attach ribbons to the corners I will pre-tie a bow with some pretty ribbon.  Cut the tails of the bows in some type of decorative shape (either a diagonal or V-notch).  Then use your hot glue gun to attach the bows to the wood, NOT the cushion.  If you attach to the cushion you will have to fight with the bows getting in the way every time that you take off the lid.
This would be a perfect garage sale find.  I think a lot of old vanity tables were made this way as well as piano or organ stools.  Having this extra storage is great.  It is perfect for thin books and anything small that you want to keep next to where you are sitting.  Happy crafting.

Kara

Saturday, September 17, 2011

Dresser Makeover

I wanted to share with you all the final product of my dresser overhaul.  I selected Light French Grey for the paint color.  There is built in handles for this dresser so unfortunately I did not get the pleasure of selecting new hardware to dress it up.  As I said in an earlier post this dresser is a built in unit.  We painted the walls behind the shelves to make the dresser stand out more against the cream colored walls.  It is a very nice color in this room and I can't wait to finish the other pieces to make it complete.  Painting the dresser turned out to be a team effort.  I painted the first coat of paint last Sunday and then Aaron painted the second coat on Tuesday night while I was having fun at Bunco.  He is so thoughtful and helpful sometimes and I appreciate him very much.  I will be sharing some more of my projects for this room in the coming weeks.  I can't wait to have a completed project to share with you all.

TIP #1: When pulling out the drawers of any type of furniture it is a good idea to label the drawers prior to pulling them out.  These drawers were so slightly different that we had to put them back in by trial and error to get them to fit, open, and close correctly.

TIP #2: Use a smooth paint foam roller when painting smooth furniture.  This will ensure that you get a smooth and not bumpy finish.  Also make sure that you are putting on several light layers instead of any heavy layers.  If heavy layers are used you risk getting more drips that you will not catch.  This is especially true when you are working with intricate wood pieces with many bumps and grooves.

Hope that you enjoyed my new look.  Happy painting so that you can make over your own furniture into something new and interesting.

Kara

New Carpet....Hooray!!!

 We slept as one big happy family on Thursday night.  The mattress and box springs have been on the floor since last weekend and have been walking around on plywood.  It has been a very loud week with the click clack of the dogs walking around.  It seems that every move that they make reverberates through the entire house.  Thursday was the only night that we actually let them sleep in the bedroom with us and both of them took turns on the bed.  In the morning both of them squished my legs and laid on the bed with us.  They never sleep on the bed so this was a big treat for both of them.


Here is a photo of the stairs all cleared off and ready to get their new fuzzies.


Our bedroom has been painted and is ready to go.  As you may be able to see on the floor I have painted "Kara Loves Aaron".  Since I met Aaron two years ago we have done many painting projects.  Every time that we do a project he either paints he loves me or I paint that I love him.  And every time that we do this I take a picture.  One day I am going to gather them all together and frame them.  It is a fun tradition that we have.


Friday morning was a very interesting day for the weather.  We woke up to nice sunshine at about 6.  By the time that I left for work at about 8 the fog started rolling in making it hard to see a block ahead.  My normal 20 minute drive turned in to about 45 minutes.  Instead of going to work at that point I decided to go garage saleing.  I was going to have to be back home by 11 so that Aaron could go to a meeting, so I thought that a garage sale search sounded much more fun than working for an hour and half.


After many long hours of installation we have new carpet up the stairs and in both of our upstairs bedrooms.  It is really pretty, but darker than I thought that it would be.  I think that it will hide some of the nasty dog hair that is always on the floors in our house.  With two dogs I don't care how many times a week that you vacuum there is always hair everywhere.  I think that I need to invest in one of those Roomba's to try and keep up with the chores around the house.  If any of you few people who actually read my blog have any experience with a Roomba let me know.  I can't justify spending that much money if it doesn't work.  I hope that everyone has a fantastic rest of their weekend.  And don't forget to click the "follow this blog" button at the top of the page.

Kara

Thursday, September 15, 2011

My new cousin Preslie's purple dress

I have finally finished the dress that I have been working on for months. I have been making this while finishing my last two semesters of graduate school. Whenever my thesis got to be too much to handle I would take this out and do a row. It takes about an hour to complete a row so overall I would say this project took me over 35 hours. I love making these dresses because the babies look so cute in them but they are a lot of work for someone so little. I know that both she and her mom, Christine, will enjoy it.

Christine is actually my mom's cousin. So I think that makes Preslie my second cousin. No matter. She is family and that is all that counts.

Friday, September 9, 2011

Spare Bedroom Overhaul

Here is a current picture of my spare bedroom.  Right now it is piled with boxes that Aaron has still not unpacked, enough furniture to fill a room at least twice this size.  There is a built in dresser with nice shelves that go all the way up the wall.  There is a cubby that is built out for a bed to fit in.  Unfortunately the cubby will only fit a full size bed and of course the bed that is in there is a queen.  Which why would you buy a full size bed in the first place?  Isn't it practical to just buy the queen?  I mean you have to buy the same size sheets anyway.  Ok, lol, back on subject... I have my collection of dumbos and elephant trinkets on the shelves in the room and really just a bunch of other miscellaneous stuff that doesn't have a home in the rest of my house.  On the bed you can see a massive collection of linens from the linen closet that have been temporarily cleared out of the linen closet.
So here is the plan.  Next week we are getting new carpet put in in the upstairs of our house.  We need to clear out the space completely including the closet doors and carpet.  All the furniture and items will temporarily move to our living room.  This whole process is making Aaron freak out.  He hates clutter, so I can't wait to see his face when we get everything moved to the living room (BTW I know that I said that Aaron hates clutter, but he is usually the one that creates it behind closed doors...I don't get it either).

In the process of clearing everything out I have decided to paint now so that I don't have to risk messing up the new carpet. I was inspired by the dining room decorations that Disney from Ruffles and Stuff did in her house.  I love the bird theme and the serenity of the colors. I also go some inspiration from Tam from the Sew Dang Cute Crafts blog.  I just love the way that the colors came out and everything in that room is so simple, yet elegantly put together.  

So through my inspiration I decided to paint the walls a cream color and the dresser, shelves and the bed a light blue/grey color.  I went to the Home Depot and got a bunch of paint samples the other day and decided on Light French Grey.  I put up the cream colors on the wall and determined that they were WAY too similar to what is already there, so I have decided to leave what is there and just paint the dresser and shelves. I am giving most of the furniture that is in there to my mom.  She says that she will just keep it for me until we move into a bigger space and have more rooms to fill with furniture, but I am just saying that she can have it.  The furniture that I am giving her is a complete matching set including a bed frame, armoire, dresser with mirror, and a night stand.  It is the set that she bought me when I was about 16.  It is still in really good shape and will look nice in her newly remodeled basement.

I am also planning on moving my sewing machine into this room when it is done.  Right now it is in my bedroom and I don't feel like I can work on any of the projects that I have wanted to because it would intrude on my peaceful place.  After all is said and done I will have a nice room to go hang out in to let the creative juices flow.

That is all for now. I just wanted to tell the world, or anyone who cares about the big plans that I have for such a small room.  I will post again about this in a few weeks to let you all know the progress.  I will also let you know if Aaron likes it because I am not taking into account any of his input on this room...it is all mine.  And I already know that he hates the color that I have picked out.  Oh well.  Take care everyone and have a great weekend.

Love,
Kara

Friday, July 8, 2011

I have officially started my etsy shop

Come check out my etsy site a the web address below.  I will be adding more stuff soon but I thought that I would start small by adding a few of my favorites.

http://www.etsy.com/shop/Auntiekarascrafts?ref=si_shop

My items are also available at La Fame Boutique in Larimer Square downtown Denver.  The boutique is located in The Walkway so the next time that you are down there go check it out.

http://www.lafameboutique.com/

Monday, January 17, 2011

Crocheted Dresses

I wanted to share with everyone this super cute picture of one of the baby dresses that I have made.  This is Quinn Delaney.  This is the dress that I made for her.  She was baptized in it this winter.  Her big sister Morgan was baptized in another dress that I made for her a few years ago.  I will have to find all the rest of the pictures of dresses that I have made.  I have made them for the two Hall girls (Gabi and Maya) as well as my adopted niece, Magdalena and my real nieces, Malaya and Mila.  Until I find those other picts you will just have to feast your eyes on this delightful looking little angel.

Monday, December 27, 2010

Tanner tubing at Andalusia Illinois. We went over to Illinois today to take Tyler snowboarding and to take Tanner tubing. I took Tanner and Aaron was Tyler's teacher. We had a great time in the freezing temperatures.

Wednesday, November 24, 2010

A plethra of hats

Adult white with pink flower  ($7)

Baby blue sparkly in woven fabric pattern  ($7)

Toddler peach cabled fabric with tassel ($7)

Lavendar baby hat ($7)
Orange toddler microfiber ($7)

Granny sqare tan and black.  Small Child ($7)


Tuesday, November 23, 2010

November Craft Night

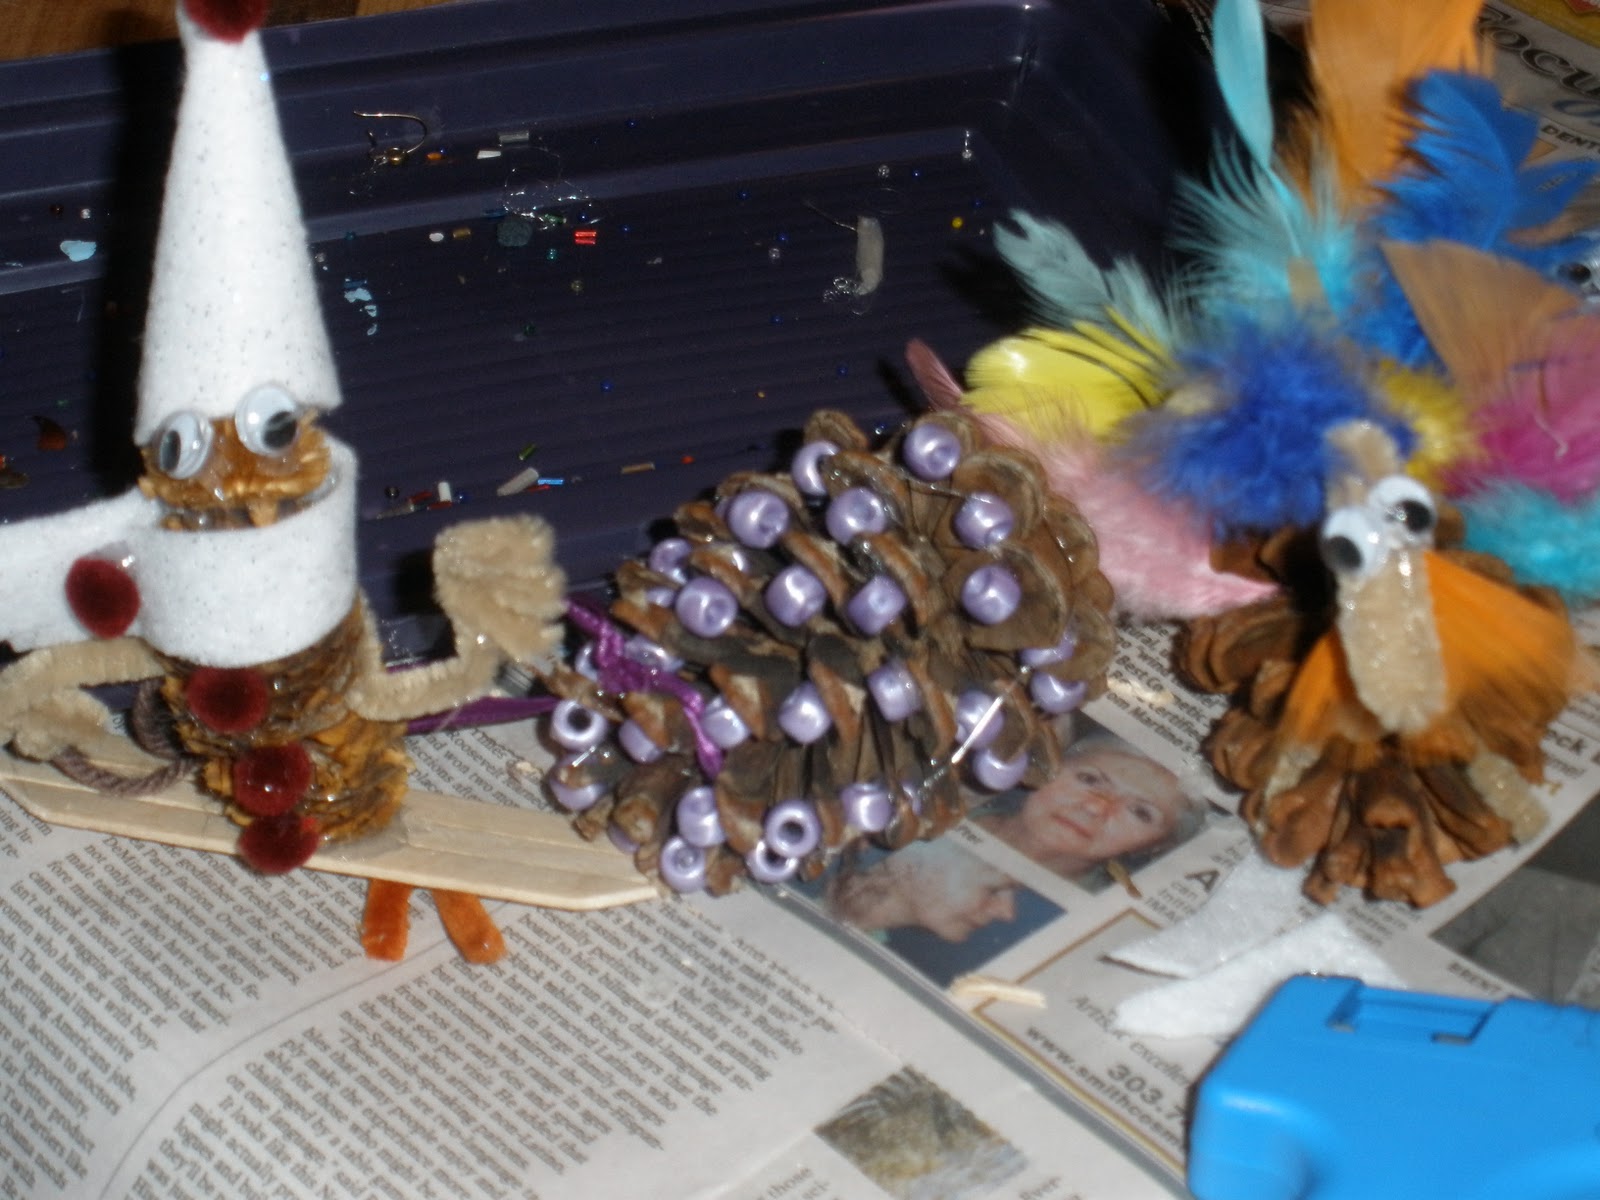
November Craft night was a flurry of activity.  Everyone was running around picking out supplies and inventing interesting designs.  The craft was creating Christmas ornments out of pine cones.

What you will need:
  • Pine cones of all shapes and sizes and anyother dried items that you think will look cool
  • String to hang your ornaments from the tree
  • Hot glue gun
  • Felt
  • Fuzzy Balls
  • Googly Eyes
  • Pipe cleaners
  • Shiny items and anything else that you have lying around that you would like to incorporate
Take a look at our creations for ideas and inspiration.

Thursday, November 18, 2010

Baby Stuff

This cute little hat is made of super soft baby yarn in white and lavendar.  It has a little pom pom on the top and will fit a new born.  (For sale - $7)


Baby dress.  This is a woven knit pattern jumper dress.  It is lavendar and white.  In my estimate it is about a 12 month size.  (For sale - $30)

Tuesday, November 16, 2010

Welcome to the Family Pepper


Aaron and I got a new dog over the weekend.  She was rescued by a friend from the side of the road.  After they spent two weeks trying to track her owners down and having no luck they sent out an email asking if anyone would like to adobt her.  Aaron and I were already in talks about getting a new dog as a playmate for Luke, so we told them that we were interested.  We took Luke over to meet her on Saturday.  They got along right away.

Her name is Pepper.  She has not been to the vet yet, so we do not know exactly what breed that she is.  She is about 9 years old with scraggly hair.  They said that her hair was all matted when they found her so that is why all of her body hair is so short.  I think that we will keep it that way.  She is a real lover and likes to be around people.  She really loves to snuggle and always seems to be smiling.

Saturday, November 13, 2010

First day of the season. Freezing our butts off. Having a good time!

Friday, November 12, 2010

Out of Gas?

So there is a funny story that happened to me this morning.  I wanted someone to take a picture of me wearing this fetching headband.  So what did I do I wore it to work so that Katie could take a picture.  I wanted to show you all how it would look on.  Cute right?   Well on my way to work this morning I forgot that my gas light came on yesterday when I was on my way to school.  While driving to work, and hoping at this point that I would make it, I ran out of gas on I-70.  Traffic is buzzing by and I coast to pull over as close to the next exit that I can get. 


At this point I call Zac and ask him to meet me at the gas station across the way.  I walked to the gas station to get a gas can and some gas.  It was freezing out this morning.  It was a whopping 32 degrees with a wind chill of 28.  I have never been so happy to have something toasty on my head to cover up my ears.  I am really glad that I wanted to show this to you all so bad that I wore it to work this morning.
So a little more about the product instead of my day.  It is peach in color and not super stretchy.  It should fit around just about anyone's head but it is not really meant to hold your hair in like some of the other cute "hippie-ish" ones that I have seen.  It has a button in the back to make it adjustable.  Perfect for that freezing day that you need to keep your ears warm but are trying not to mess up your hair.  Once again I can make these in pretty much any color with any cute button on the back.  For a more stylish way of wearing it you can wear the button in the front.  I tried it that way too with a couple that I made and it looked tres chic.
(For sale - $10)  if you are interested in a custom just ask.

Thursday, November 11, 2010

Scarf Me

Need to keep your neck warm?  This is a perfect thing for you then.  These stylish scarves are short and fit right around or inside the collar of a coat.  They have super cute button accents to add to the style.
This brown scarf has a braided cable and can be worn tight or loose around the neck.  (Sale for - $15)


Bundle up this snow season in the perfect accessory. 
The baby blue scarf is made out of super soft baby yarn and will look great with any outfit.  (Sale for - $15)

Wednesday, November 10, 2010

Wrister Twister

Just finished my first pair of wristers this weekend.  They have a nice woven cable down the front and a seem on the hand side.  They have a thumb hole to keep them in place.  Perfect for the winter weather that is headed our way.  This pair is for sale for $15.  I can make them in a variety of sizes and patterns.  Let me know if you are interested and we can work something out.


Christmas is on the way and it is a great time to start shopping for those on your list.  What is a better gift than a hand made piece of functional art.  Keep your loved one's warm this winter with a nice present from Auntie Kara's Crafts.