I don't know about you but I've always sucked at hula hooping. Then I realized it wasn't me it was the hoop. Using the $2 gem from the toy store only works when you are a kid because they are sized for kids. As an adult you need a bigger hoop to match your bigger frame. So introducing the DIY hula hoop.
Supplies you need:
3/4" diameter 160 psi irrigation pipe
10 3/4" male/ male pipe couplers
About 1/2 yard fabric cut into ~2" strips
Gorilla glue or some type of glue that adheres to plastic
To make:
First you will need to size your hoop by stretching the pipe out so that the hoop is about as tall as your belly button. Cut the pipe using a utility knife.
Now heat the first end of the pipe in boiling water for about 45-60 seconds. Fit the coupler into this end. If you would like to weight your hoop you can either add sand or water. For an average sized person add about 2-3 cups of water. Now without spilling heat the other end of you pipe in the boiling water. Heat this side longer about 60-90 seconds. Then fit the pipe with the coupler into a circle.
Now try out your hoop. Easy right!?!?
If you're still having trouble stand with your feet staggered front to back and move your hips in a slow front to back motion.
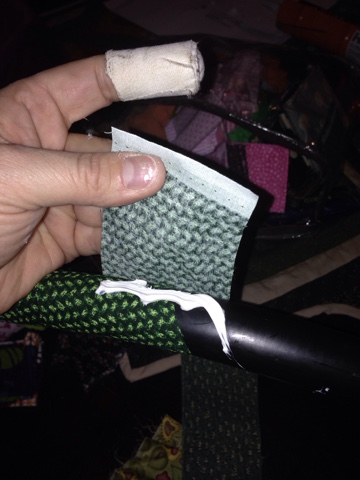
Ok now to cover the hoops. Using the glue make a line along the top of the piping and start wrapping it with the fabric in a spiral motion. Adding another line of glue when you reach the end so that there is glue all the way around the hoop. When you get the the fabric end apply a little glue to make it stick. Overlap the next section with some more glue and keep going.
Ending a piece of fabric:
Mid section wrapping spiral:
Starting a piece of fabric:
Wrap the fabric to the end. Let the glue dry overnight and then get to jamming out with your fun new toy.
In addition to using this for fun and exercise we also are teaching our 2 year old son to ski using the hoop as a leash. It teaching great forward motion and does not pull back on them using traditional leashes.


